PhotoBiz, LLC Logo
  • WELCOME
  • WEBSITE BUILDER
  • SEO
  • CLIENT GALLERIES
  • FORMS
  • SERVICES
    • WE BUILD IT FOR YOU
    • SEO GO
    • CUSTOM WEBSITE DESIGN
    • LOGO DESIGN
    • SOCIAL MEDIA MARKETING
    • COACHING
  • GROWTH HUB
  • CONTACT
MENU

How To Use Video Blocks

Oct 8, 2025 | By: PhotoBiz Knowledge Base

Share

How To Add Video Blocks

This video tutorial will guide you through adding video blocks to your PhotoBiz website builder.

How to Use the Video Block in the PhotoBiz Website Builder

The Video Block in PhotoBiz allows you to showcase video content in a clean, professional, and customizable way. You can embed videos from YouTube or Vimeo, or upload videos directly to your PhotoBiz account.

With multiple layout styles and autoplay options, you can create dynamic video backgrounds, banner clips, or traditional players that fit your brand and website design.

Ways to Add a Video

You can add videos to your Video Block in two ways:

  • Upload a video directly to your PhotoBiz Video Library
  • Embed a video using a code from YouTube, Vimeo, or another platform

Need help uploading? Check out:

  • How To Upload Video To PhotoBiz
  • How To Upload A Video To YouTube
  • How To Upload A Video To Vimeo

💡 Pro Tip

Using the Website Package? You can upload videos up to 4MB.
Need to upload larger files (up to 50MB)? Add the Original Files upgrade in your account. 

Learn More: How to Add Original Files to PhotoBiz


STEP ONE

Log In and Open the Website Builder

  1. Log into your PhotoBiz account.

  2. Click on WEBSITE from the left-hand menu.

STEP TWO

Choose a Page

  1. Click on the page where you’d like to add the video—or create a new one.

  2. Add the Video Block using one of these options:

  • Quick Add: Click the Video icon on the right. The block appears at the bottom of your page.

  • Drag & Drop: Click and hold the Video icon, drag it to your desired spot (watch for the teal line), and release.

STEP THREE

Pick a Block Style

You’ll see two options:

  • Blank Block: Start from scratch using your global styles.

  • Pre-designed Block: Choose from stylish, ready-made layouts.

Click Select under your preferred style to add it to your page.

STEP FOUR

Add Your Video

Once your block is added, you’ll be in the Edit Video section.

If you selected a pre-designed block, it may come with a sample video. You can:

  • Keep the sample video

  • Swap it out with your own by choosing a new Video Type from the drop-down menu

STEP FIVE

Choosing Your Own Video Source

The right-side menu will let you pick your video type:

Option 1: Embed Code

Use a code from YouTube, Vimeo, or another platform.

  • Paste the embed code into the Embed Code field
  • Add a title and description
  • Upload a Mobile Cover Image (optional but required for banner and fullscreen layouts)
  • Add a button with an optional link:

    • None

    • External link

    • Page on your website

    • Form

    • Marketing campaign or landing page

    • File (PDF, JPG, PNG, GIF)

    • Phone, email, address, or even another video

Option 2: My Videos

Use a video uploaded to your PhotoBiz Video Library.

  • Select a video from your account or upload a new one
  • Add a title, description, and optional button and link

Note: If you don't upload a mobile cover image, a basic play button will show on mobile. If you'd rather show a still from your video, don’t upload a cover image.

Learn More: Upload New Videos to your PhotoBiz account. 

Embedded Video

Use a 3rd party video player such as YouTube or Vimeo.

Video Library

Select a video you've uploaded to PhotoBiz

STEP SIX

Choose a Layout

You can choose from the following Video Block layouts. Here's a quick overview of what each one does:

Full Screen: Displays your video across the entire browser width and height. Slight cropping may occur to fill the full screen.

Banner: Displays your video as a fixed-height banner that stretches across the page.

Standard: Shows the video in its original dimensions with a standard player and play button. No cropping is applied.

No Crop Banner: Displays the full video without cropping while maintaining a banner-style layout.

Video Left: Places the video on the left side with text content on the right.

Video Right: Places the video on the right side with text content on the left.

Video Large Left: Shows a larger video on the left side with smaller text or image content on the right.

Video Large Right: Shows a larger video on the right side with smaller text or image content on the left.

Text Overlay Center Left: Places your video in the background with centered text overlay aligned to the left side.

Text Overlay Center Right: Places your video in the background with centered text overlay aligned to the right side.

Video Overlay Left: Displays the video on the left with an overlay text box or image on top of it.

Video Overlay Right: Displays the video on the right with an overlay text box or image on top of it.

Overlay Split Left: Splits the block visually, with the video and overlay content aligned to the left side.

Overlay Split Right: Splits the block visually, with the video and overlay content aligned to the right side.

Overlay Box Left: Displays the video with a boxed overlay (text or image) positioned on the left.

Overlay Box Right: Displays the video with a boxed overlay (text or image) positioned on the right.

STEP SEVEN

Video Autoplay & Loop Behavior

When you upload your video directly to PhotoBiz, autoplay and looping are automatically supported in the following layouts:

  • Full Screen
  • Banner
  • No Crop Banner
  • Text Overlay Center Left
  • Text Overlay Center Right
  • Video Overlay Left
  • Video Overlay Right
  • Overlay Split Left
  • Overlay Split Right
  • Overlay Box Left
  • Overlay Box Right

These layouts are perfect for background or header videos that play automatically and loop seamlessly for an engaging visual effect.

The Standard layout does not autoplay or loop, making it ideal for videos that include dialogue, voice, or user interaction.

Important: Uploading your video to PhotoBiz guarantees autoplay and looping in these supported layouts. Embedded videos from YouTube or Vimeo may not autoplay depending on browser or device settings.

STEP EIGHT (Optional)

Autoplay for Embedded Videos (YouTube or Vimeo)

If you use an embedded video instead of uploading to PhotoBiz, you can enable autoplay manually. Keep in mind that most browsers require autoplay videos to start muted.

Vimeo Autoplay

  1. Click Share on your Vimeo video.

  2. Under the Embed section, click Show Options.

  3. Check the box for Autoplay this video.

  4. Copy the updated embed code and paste it into your Video Block.

Need Help? Check Out Vimeo's Full Guide on Embedding Videos

YouTube Autoplay

  1. Click Share → Embed on your YouTube video.

  2. Copy the embed code.

  3. Add ?mute=1&autoplay=1 immediately after the video URL, before the ending quotation mark.
    Example:


Enabling videos to play automatically when visitors land on your page can pose challenges. Most browsers and devices disable autoplay for video content as a default setting. While there are ways to work around this limitation and achieve autoplay, it's important to note that if your video has audio, it will be muted. Here are the steps you can follow if you're aiming to incorporate autoplay video content on your webpage.

Vimeo Autoplay 

If your video is hosted by Vimeo, click share on the video. Next to the Embed section, click show options.

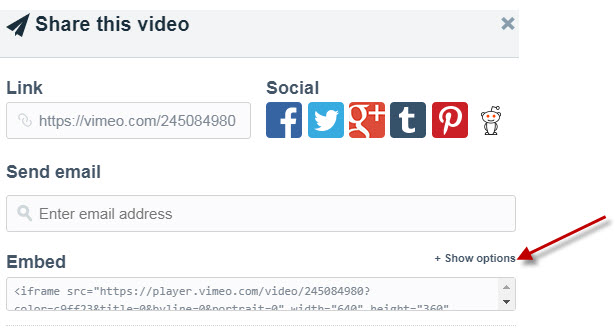
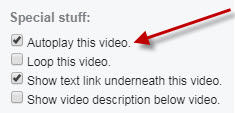
Under Special Stuff, click Autoplay this video. Check the box for autoplay.

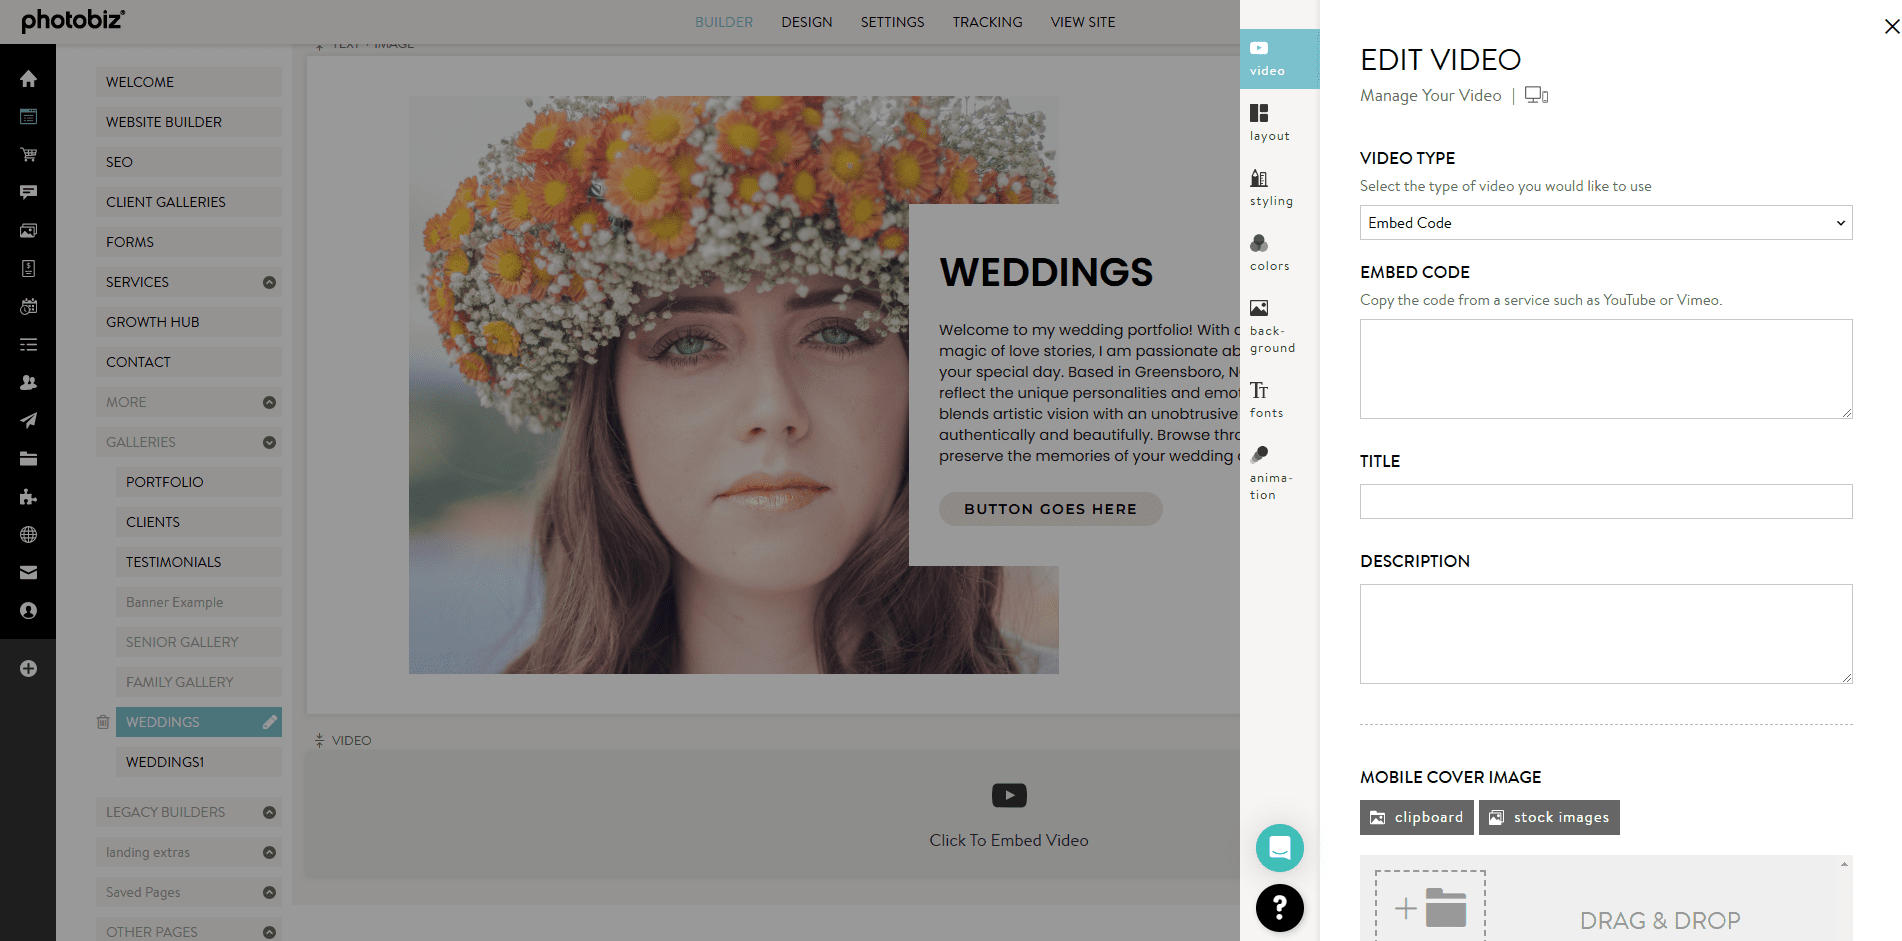
Copy the autoplay embed code and paste it into your Video block.

YouTube Autoplay

If your video is hosted by YouTube, you will need to manually add the autoplay code to your YouTube embed code.

Click share on the video and click embed. Copy the code and paste it into your Video block.

Your code will look like this:

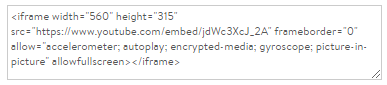
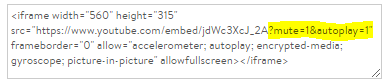
To make your video autoplay, type ?mute=1&autoplay=1; right after the video's URL, before the ending quotation mark.

Your code will now look like this:


Styling Your Video Block

Styling options vary by layout. Here's what you can customize:

Overlay Options (Banner, Full Screen, No Crop Banner)

  • Overlay Opacity – Controls transparency behind text/buttons
  • Scroll Down Arrow – Show/hide a scroll cue
  • Title / Description / Button Alignment – Choose Left, Center, or Right
  • Space Below Blocks – Adds space before the next content block

Standard Player Layout

  • Alignment options for title, description, and button
  • Space Inside Blocks – Adjust spacing inside the block

Colors

Each layout has its own color settings, which will override your global site colors from the DESIGN tab.

Background Options

You can set a custom background for your video block:

  • Upload a custom image or choose from the library

  • Display options: Tile, Top Left, Centered, or Cover

Fonts

Override your site-wide fonts for:

  • Title
  • Subtitle
  • Button Text

Adjust size, spacing, and line height to match your style.

Animations

Choose a hover animation for your button:

  • None
  • Fill
  • Overlay
  • Scale
  • Arrow

Click SAVE CHANGES at the bottom to publish your updates!

PhotoBiz Live: Ask Me Anything Video

Previous Post Next Post

Related Posts

How Can I Add TikTok To My Website?

September 30, 2024

How to Change the Fonts on Video Blocks

December 12, 2023

How Can I Add YouTube Shorts To My Website?

October 30, 2024

How Can I Add Instagram Posts and Reels To My Website?

June 27, 2024

Need More Help?

CONTACT US

BUILDER

Website Builder Client Galleries Blog  

TOOLS

Ecommerce Scheduler Quotes & Invoices  

MARKETING

Email Marketing Forms Contacts SEO  

MORE

Account Settings Domain & Email Files PhotoBiz Growth Hub Blog Go To PhotoBiz.com  
Copyright © 2004 – 2025 PhotoBiz, LLC All rights reserved
Crafted by PhotoBiz
PhotoBiz, LLC Logo
CLOSE
  • WELCOME
  • WEBSITE BUILDER
  • SEO
  • CLIENT GALLERIES
  • FORMS
  • SERVICES
    • WE BUILD IT FOR YOU
    • SEO GO
    • CUSTOM WEBSITE DESIGN
    • LOGO DESIGN
    • SOCIAL MEDIA MARKETING
    • COACHING
  • GROWTH HUB
  • CONTACT