
In your Ecommerce site, you have the ability to set up custom print options for your prints. This can include color options, special papers or matting.
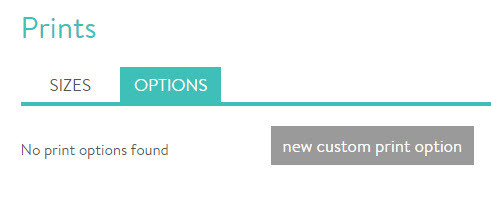
From your ecommerce control panel, mouse over sell online, and select prints.
From here select the tab for options and choose the grey button for new custom print option.
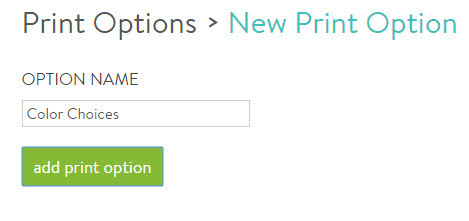
Enter an option name to serve as the category label for what you want your client to choose from (e.g., color, paper, matting). Note: Do not enter the option choices in this area. Once you have entered in your option name, click on add print option to continue.
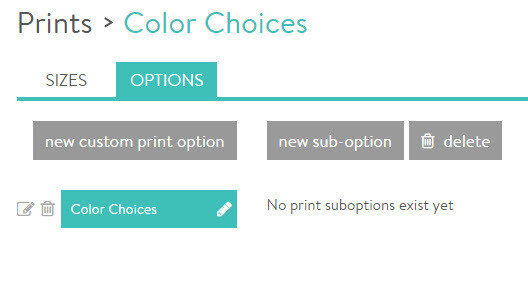
Tip: You can return to your Print Options and add sub-options by clicking on the Print Options bread crumb.
To add the choices that your clients will have to choose from, click on the new sub-option button.
Now you can enter in your sub-option names and any additional prices for the options, if needed.
Important Note: The Sub-Options appear as choices in a drop-down selection list to your customers, with the top item in the list already selected by default. For that reason, your first Sub-Option will always be the default choice. For example, if you are creating color choices, your first Sub-Option should be something like As Shown.
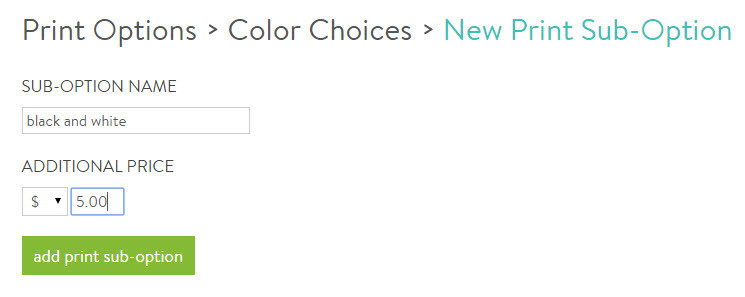
Click on the add print sub-option to save your selection. You can repeat these steps until all options have been added.
0 Comments